Building
The project should work on Linux, Windows and OSX. It should work with any ide that is either supported by cmake or has direct cmake support. Personally I'm using vscode with clangd at the moment. But also the command line with plain old make.
Linux
There is a Makefile wrapper around the build system. You can just run make in the project root folder.
Every project has some extra CMake targets. There are e.g. voxedit-run, voxedit-debug and voxedit-perf if the needed tools were found during cmake's configure phase.
That means that you can compile a single target by typing make voxedit, run it by typing make voxedit-run, debug it by typing make voxedit-debug and profile it by
typing make voxedit-perf. There are also other targets for valgrind - just use the tab completion in the build folder to get a list.
Windows
The project can be built with every ide that supports cmake. QTCreator, Eclipse CDT, vscode or Visual Studio. Just install cmake, generate the project files, and open them in your ide.
Set up ninja to speed up the whole build-link-run cycle a lot!
MSI file associations
The MSI's feature-selection dialog contains voxedit > File associations with an entry for each supported extension. Only .vengi is selected by default. Enable .vox or other types explicitly to open them with VoxEdit, or disable File associations entirely. Unchecked extensions retain their existing defaults and are not registered as VoxEdit file types. The importer can still load supported formats from inside VoxEdit.
Selected types are registered in Open with and Windows default-app settings. Windows' protected per-user default choices take precedence; use Open with > Choose another app or Settings > Apps > Default apps if Windows already has a preferred application. The installer does not modify protected UserChoice entries or MIME types. Explorer thumbnails are a separate feature and do not select file-opening associations.
The Windows regression is contrib/installer/windows/tests/FileAssociationsTest.ps1. Run it on an isolated Windows test machine using 64-bit PowerShell with administrator rights and an interactive desktop:
.\FileAssociationsTest.ps1 -Msi C:\test\vengi.msi -WixPatch C:\source\contrib\installer\windows\wixpatch.xml -VoxelFixture C:\test\sample.vox
Use -InitialMsi to remove an existing test installation first. The test installs the default configuration, confirms that .vengi is registered and .vox does not open in VoxEdit, repairs and removes it, then repeats with both types enabled. ShellOpenTest.ps1 calls Windows ShellExecuteEx on the fixture file and checks the launched process and visible window. It does not invoke VoxEdit directly. The test also checks every generated extension for unwanted registrations, preserves unselected defaults and MIME types, compares protected UserChoice entries, and verifies cleanup after removal. It restores temporary competing defaults in a finally block and leaves the tested MSI installed.
For unattended selection, the .vengi and .vox feature IDs are Assoc_vengi and Assoc_vox. Include the editor feature when using ADDLOCAL, for example ADDLOCAL=CM_C_voxedit,FileAssociations,Assoc_vengi,Assoc_vox. ADDLOCAL=ALL intentionally selects every extension.
The adjacent CMakeLists.txt packages a staged Windows payload using the production CPack/WiX configuration. Configure it with PAYLOAD_DIR and CMAKE_SIZEOF_VOID_P=8 for x64, then run cpack -G WIX in its build directory. This checks packaging changes without rebuilding the engine; identify the source of the staged binaries when reporting results.
Visual Studio Code
- Download ninja ninja-build.org
- Download cmake cmake.org/download
- Download vscode code.visualstudio.com
- Download Visual Studio (for the compiler) visualstudio.microsoft.com
Inside vscode you have to install the c++ plugins. The easiest might be to install the c++ plugins from microsoft. Just make sure the cmake plugin is part of the collection.
If you have problems with the intellisense plugin from microsoft, you can also use the clangd plugin.
Open your git clone directory in vscode and let it configure via cmake. It will pick ninja and the visual studio compiler automatically.
Make
In order to use the Makefile, you should install ninja (see above), gnu make, start Native Tools Command Prompt from your start menu, and just run make in that shell in your git clone directory. Keep in mind that ninja, make and cmake must be available via PATH environment variable.
Check out the Linux section about more details regarding the Makefile targets.
Here is a step-by-step guide from a user to compile vengi on a windows machine via command line make. After you've downloaded the above mentioned software, run the following steps:
- Install CMake
- Win+R > type
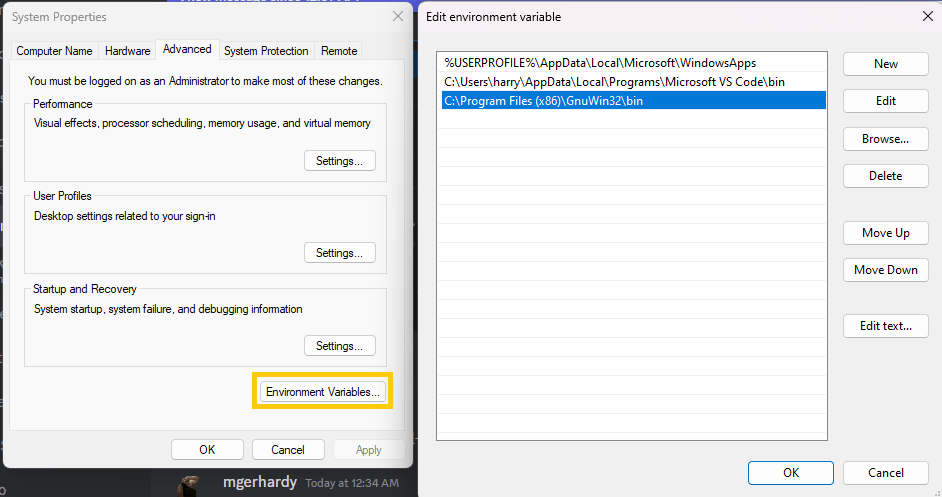
sysdm.cpl> Advanced > Environment Variables...- Click "New" and add this to your
PATH:C:/Program Files (x86)/GnuWin32/bin- Add
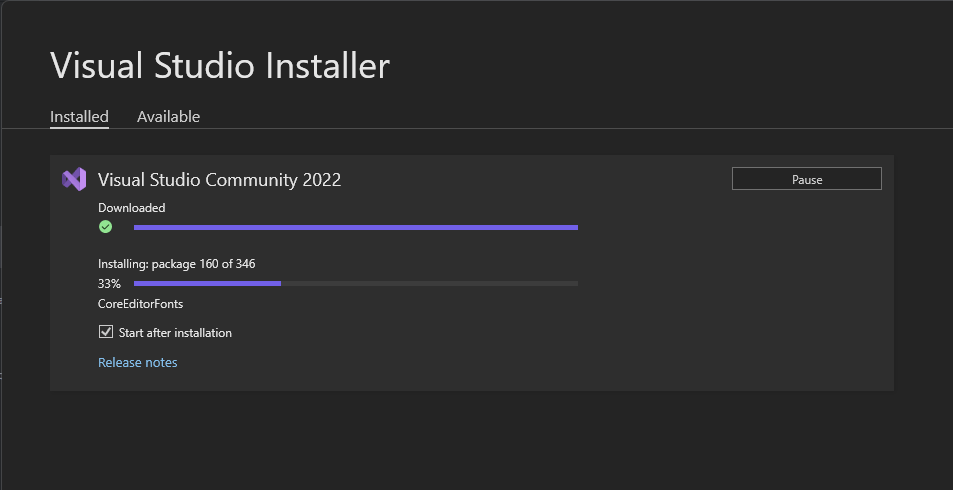
ninja.exetoPATHor if you're lazy paste it intoC:/Program Files (x86)/GnuWin32/bin- Install Visual Studio Community
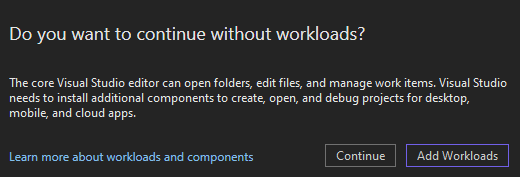
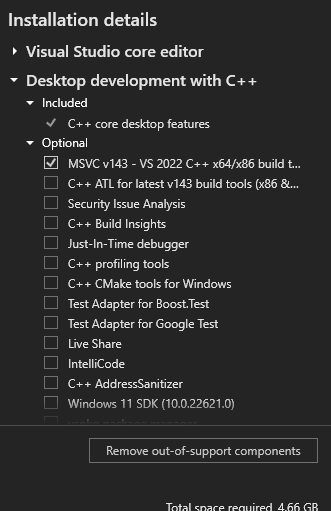
- You need to add at least 2 Workloads before installation: "MSVC" & "C++ Address Sanitizer"
- Navigate find the C/C++ compiler
cl.exesomewhere inC:/Program Files/Microsoft Visual Studio/<year>/Community/VC/Tools/MSVC/<version>/bin/Hostx64/x64/cl.exeand copy this path. Example:C:/Program Files/Microsoft Visual Studio/2022/Community/VC/Tools/MSVC/14.38.33130/bin/Hostx64/x64/cl.exe- Copy the path in the folder address bar and add 3 more environment variables
CCandCMAKE_C_COMPILERandCMAKE_CXX_COMPILERwith this path value.- Then add just the directory (without
cl.exe) into thePATHenvironment variable- Open Visual Studio Community > Skip Sign-In > Skip this for Now
- Restart computer
- Windows > Search >
x64> open:x64 Native Tools Command Prompt for VS 2022cdto the vengi folder- Type
maketo configure and build or build specific targets likemake voxeditormake voxconvert
If you want to go further, install vcpkg - see dependencies for the command line - but you can skip here if you don't want vcpkg.
Mac
You can generate your xcode project via cmake or build like this:
mkdir build
cd build
cmake ..
cmake --build .
If you are using the cmake Makefile generator, you get the same targets as for Linux above. You can also just type make voxedit-run to compile and run only VoxEdit.
Hints
If you encounter any problems, it's also a good start to check out the build pipelines of the project. This is always the most up-to-date information about how-to-build-the-project that you will find. But also please don't hesitate to ask for help on our discord server.
Enforce bundled libs
You can enforce the use of the bundled libs by putting a <LIB>_LOCAL=1 in your cmake cache.
Example: By putting LUA54_LOCAL=1 into your cmake cache, you enforce the use of the bundled lua sources from contrib/libs/lua54.
Build doxygen
Run make doc from the project root to execute doxygen. After that install the mcss theme as described here: mcss.mosra.cz/documentation/.